
A Parent's Practical Guide on How to Baby Proof Stairs
The most effective way to baby-proof your stairs is by installing hardware-mounted safety gates at both the top and bottom. This creates a secure physical barrier, preventing curious crawlers and toddlers from accessing the staircase unsupervised.
Why Stair Safety Is a Top Priority for Parents
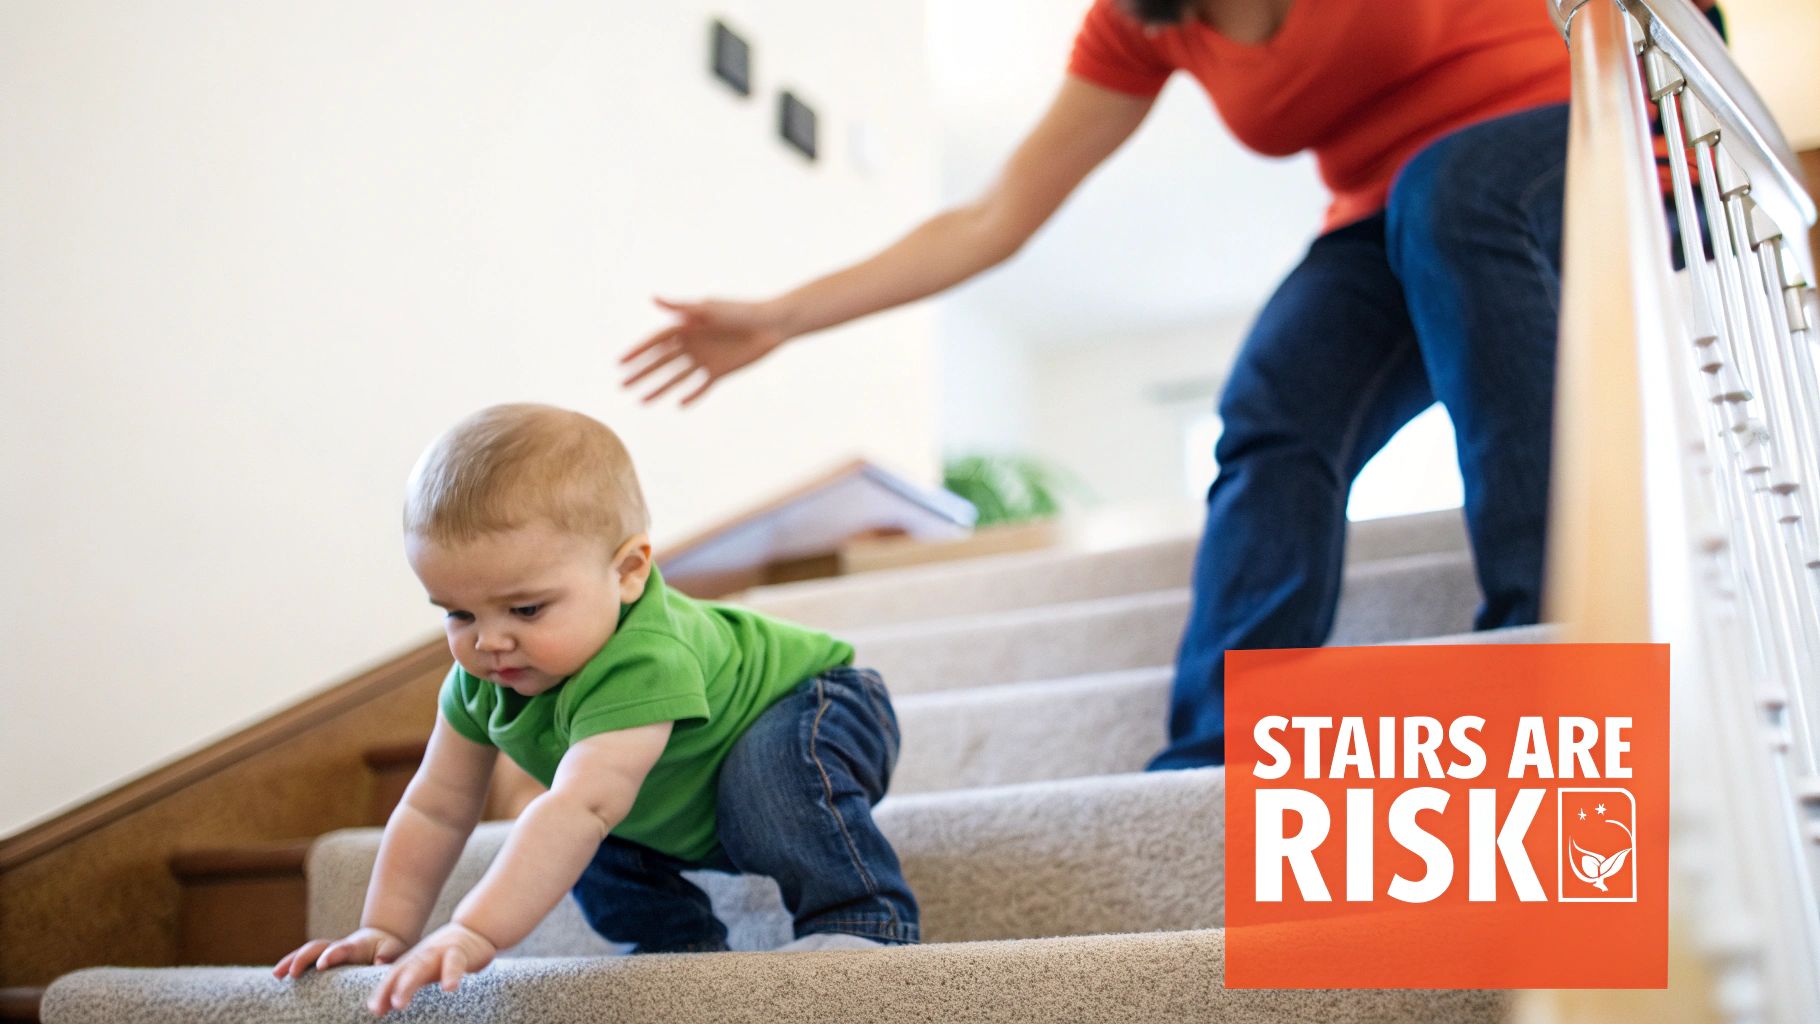
The moment your baby becomes mobile, your perspective on your home changes completely. The living room transforms into a new world for exploration, and the staircase can appear as an irresistible challenge to a tiny adventurer.
This developmental milestone brings immense joy, but also a natural level of parental concern. While vigilant supervision is your first line of defense, it's impossible to be present every second. A brief moment to answer the door or check on dinner is all it takes for a determined crawler to reach the bottom step.
Understanding the Real Risks
Proactively baby-proofing your stairs is not about being overprotective; it's about creating a safe environment where your child can explore without facing serious hazards. The risks are significant, and understanding them often motivates parents to take preventative action.
Falls are a leading cause of non-fatal injuries for young children globally, and stairs are a common factor. Research highlights the danger: each year, over 93,000 children under the age of five are treated in emergency rooms for stair-related injuries. Even more telling is that parents of children injured in these falls were found to be 65% more likely to not have safety gates installed. You can explore the data further in the Safe Kids Worldwide report on protecting children in your home.
This is about preventing more than just minor bumps and bruises; a fall down a staircase can lead to severe injuries. Taking the time to properly secure your staircase is one of the most impactful safety measures you can implement for your child.
Consider stair gates not just as another task, but as an essential component of your home's safety infrastructure. They provide invaluable peace of mind, allowing you to focus on the joys of parenting rather than constant worry over a potential accident.
Implementing the right solutions transforms a source of stress into a secure part of your home, offering a practical investment in your family's well-being and giving your child the freedom to develop within safe boundaries.
Choosing the Right Safety Gate for Your Home
Selecting a baby gate for your stairs is a critical decision. When learning how to baby proof stairs, this is your single most important protective measure. The market is filled with options, but they primarily fall into two categories: hardware-mounted and pressure-mounted gates.
Understanding the difference is crucial for your child’s safety. One type is specifically designed for high-risk areas like the top of a staircase, while the other is suitable for less critical zones.
Hardware-Mounted Gates: The Only Choice for the Top of Stairs
For the top of any staircase, a hardware-mounted gate is the only safe and acceptable option. This is a non-negotiable safety standard recognized by child safety experts and experienced parents alike.
These gates are physically drilled and screwed into the solid structure of your walls or banisters, creating a barrier as secure as a locked door. A determined toddler can exert surprising force, and a hardware-mounted gate is engineered to withstand pushing, pulling, and shaking, making it a reliable part of your home's safety system.
When a serious fall is the risk, you need a solution physically anchored to your home. A pressure-mounted gate at the top of the stairs creates a false sense of security and can fail at a critical moment.
Safety experts, supported by research on gate-related injury prevention, have consistently demonstrated that pressure-mounted gates are not designed to hold a child’s weight at the edge of a drop. Held in place by tension alone, they can be dislodged by a strong push, potentially leading to a serious accident.
When to Use a Pressure-Mounted Gate
Pressure-mounted gates have their place in a childproofed home. They are excellent for separating rooms or blocking the bottom of the stairs, where the risk of a significant fall is eliminated. Their main advantage is convenience, as they can be installed in minutes without drilling.
However, for top-of-stairs use, their design includes a major flaw: a threshold bar that runs along the floor. This bar presents a significant trip hazard for adults, especially when carrying a child or navigating in low light. For less critical areas, they remain a flexible and effective solution.
To help you decide, here is a side-by-side comparison.
Hardware-Mounted vs Pressure-Mounted Gates: A Comparison
This table outlines the essential differences to help clarify your choice.
| Feature | Hardware-Mounted Gate | Pressure-Mounted Gate |
|---|---|---|
| Best For | Top of stairs, high-risk areas | Bottom of stairs, doorways |
| Security | Extremely High - physically anchored | Moderate - can be pushed out |
| Trip Hazard | None - swings fully open | Yes - has a bottom threshold bar |
| Installation | Requires drilling into studs | Uses tension, no tools needed |
Ultimately, selecting the correct type of gate for the appropriate location is the most important step you can take.
Key Features to Look For
Once you've decided on the mounting type, certain features can enhance both safety and daily convenience. Quality is paramount; a flimsy gate will not withstand the constant use it will endure. Our guide on investing in durable baby products explains why this is vital for long-term safety.
Look for these valuable features:
- JPMA Certification: The Juvenile Products Manufacturers Association seal confirms the gate has passed rigorous, independent safety standards. Do not purchase a gate without it.
- One-Handed Operation: You will frequently be carrying something—or someone. A latch that can be opened with one hand is a practical necessity.
- Auto-Close Mechanism: This feature provides an extra layer of safety. It automatically closes and latches the gate behind you, eliminating the risk of it being left open accidentally.
A Realistic Guide to Installing Your Stair Gate
You’ve selected the ideal hardware-mounted gate. Now comes the installation, a step that can feel intimidating. A secure gate is only as effective as its installation, but achieving a rock-solid fit is more straightforward than you might think.
You don't need to be a DIY expert. The process relies on a few core principles: finding a solid anchor point, ensuring the gate is level, and using simple workarounds for common architectural challenges. A correctly installed gate provides genuine security.
This process flow illustrates the key stages of how to baby proof stairs, from measurement to final checks.
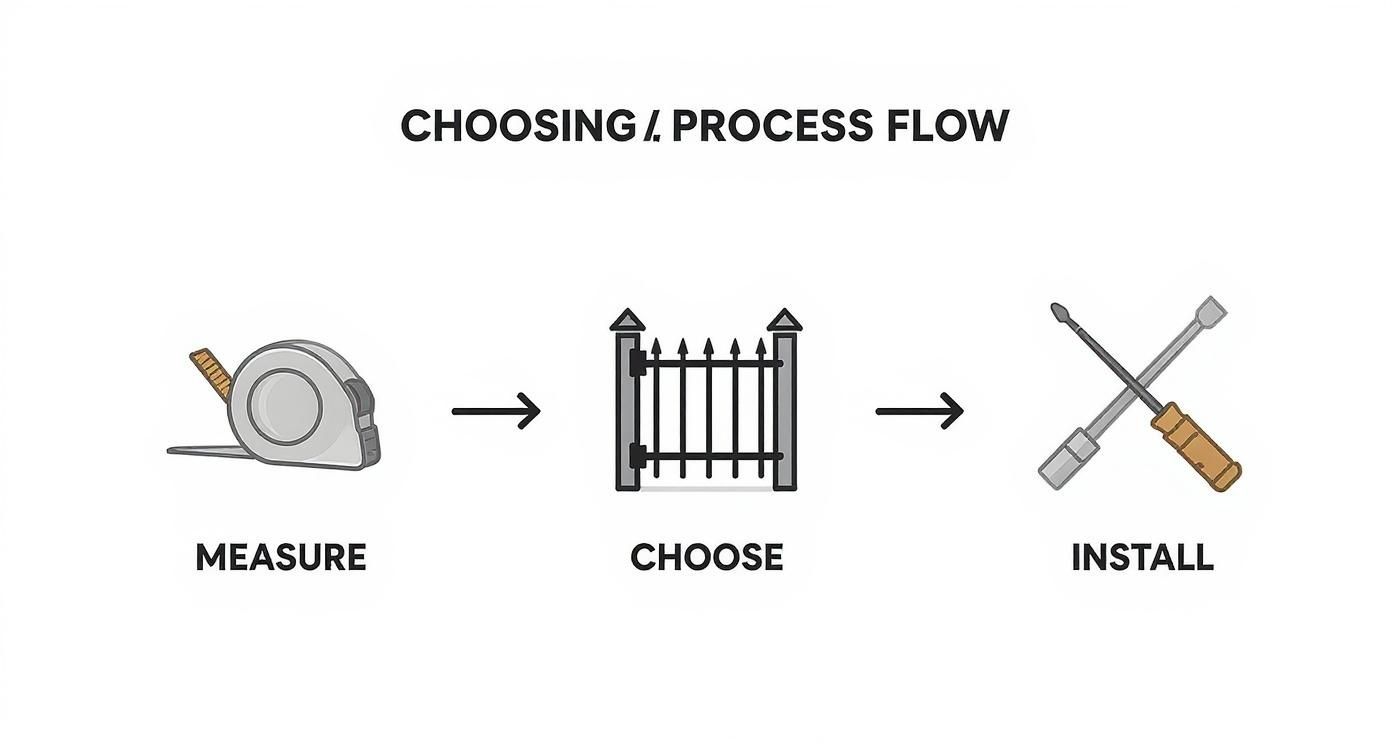
As you can see, a successful installation is the final, crucial step in a thoughtful safety plan.
Finding Your Anchor: The Importance of Wall Studs
The strength of a hardware-mounted gate comes from securing it directly into the wooden framework behind your drywall—the studs. This is the most critical step. Drywall anchors alone are insufficient; they can pull out under the repeated stress a toddler can apply.
Your first task is to locate these studs. An electronic stud finder is the easiest tool for the job.
- Slide it slowly across the wall where you plan to mount the gate's hardware.
- When it beeps or lights up, you've found a stud.
- Use a pencil to mark both edges of the stud. This helps you find the center, ensuring you drill into the strongest part of the wood for a secure connection.
What if there's no stud exactly where you need one? This is a common issue. Never compromise by mounting into drywall alone. Instead, secure a piece of wood (a 1x4 board is ideal) horizontally across the wall, anchoring it into the studs you can locate. This creates a solid mounting surface, allowing you to install your gate hardware anywhere along the board.
Tackling Common Installation Challenges
Staircases are rarely simple, perfectly symmetrical structures. You may encounter a few common obstacles, but they all have practical solutions.
Dealing with Banisters and Newel Posts
A frequent challenge is mounting a gate to a rounded or decorative banister post without causing permanent damage. The solution is a no-drill banister adapter kit. These clever devices use straps to attach a flat mounting surface to your post, providing a secure place to install the gate's hardware without drilling into your woodwork.
Working Around Baseboards
Another common issue is a baseboard or molding that prevents the bottom of the gate from sitting flush against the wall, causing it to hang crookedly. This is both unsafe and affects the gate's operation.
Most gate kits include spacers for this exact purpose. You install the bottom hinge into the wall just above the baseboard, then use the spacers for the top hinge. This pushes the top mount out to align with the bottom, ensuring the gate hangs perfectly vertical. A level is essential here; a plumb gate operates smoothly and reduces stress on the hardware over time.
The Final Checks for a Secure Fit
Once the hardware is in place, perform a final quality check before considering the job complete.
- Give it a good shake. Push and pull firmly on the gate from different angles. It should not wiggle, shift, or feel loose.
- Test the latch. Open and close it multiple times. The latch should engage securely every time without needing to be jiggled or forced.
- Check the swing. The gate should swing open and closed smoothly without catching on the floor or scraping the wall.
These final checks are what differentiate a finished installation from a truly safe one, delivering the peace of mind you are seeking.
Beyond the Gate: Essential Stair Safety Habits
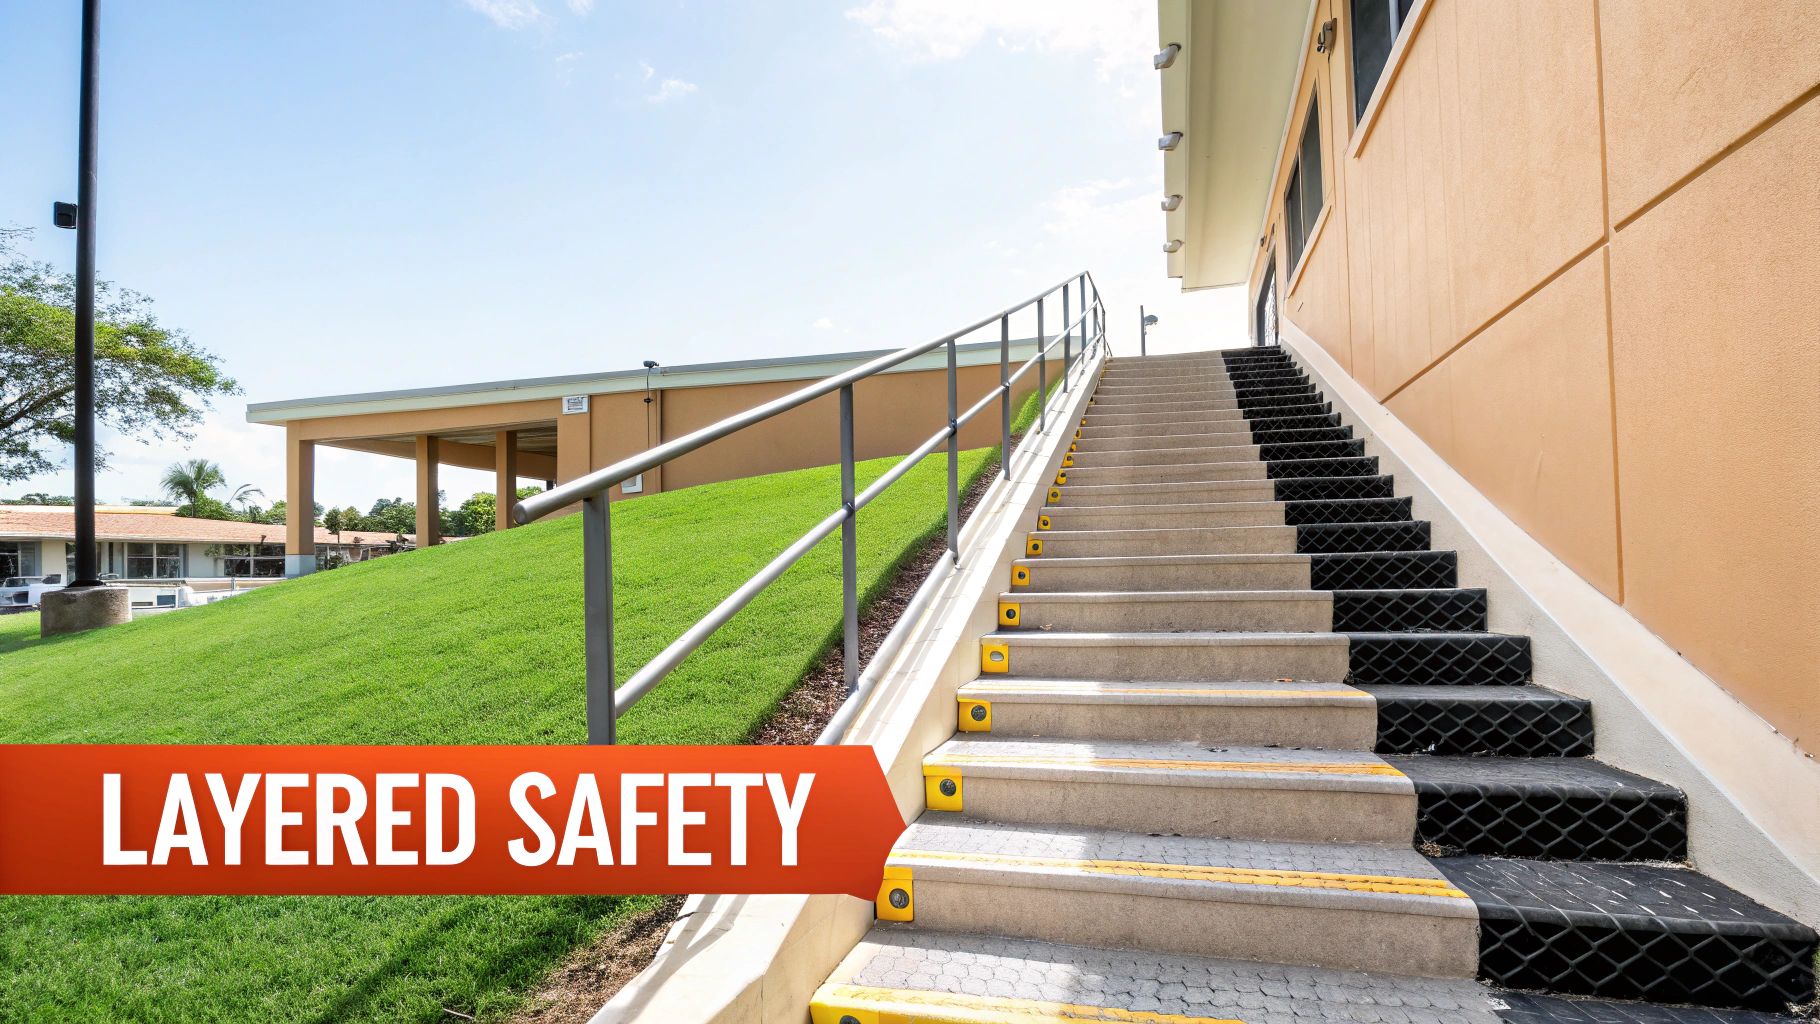
A correctly installed baby gate is your primary line of defense, but comprehensive stair safety involves multiple layers of protection. Once the gate is in place, it's time to evaluate the staircase itself and establish simple, consistent habits.
These routines help create an environment that is fundamentally safer for a mobile toddler, addressing potential risks before your child even approaches the gate.
Create a No-Clutter Zone
One of the simplest and most effective safety rules is to keep the stairs completely clear at all times. A single shoe, a forgotten toy, or a stack of mail can be a trip hazard for anyone, but it poses a significant danger to a child mastering their balance.
Establish a strict no-clutter policy for the whole family. The stairs are a pathway, not a storage area. This habit costs nothing and dramatically reduces the risk of falls for everyone in the household.
The objective is to transform your entire stairway from a source of anxiety into a secure part of your home. By adding these smaller safety measures, you build a comprehensive safety net that addresses real-world family life.
These environmental modifications are highly effective. While gates are essential, research indicates that factors like keeping stairs in good repair and adding carpeting can contribute to injury prevention by 5% to 24%. A study on child stair safety emphasizes how these combined efforts make a tangible difference. You can discover more about these protective factors in the research.
Improve Visibility and Traction
Many falls are caused by poor lighting or slippery surfaces. Polished hardwood stairs, while beautiful, can be like an ice rink for a toddler in socks.
Consider these simple and effective upgrades:
- Add Non-Slip Treads: These are highly beneficial. You can find adhesive strips, available in clear or carpeted styles, that stick directly onto each step. They provide crucial grip that can prevent a minor slip from becoming a serious fall.
- Ensure Proper Lighting: Your staircase should be well-lit, both day and night. A simple plug-in night light at the top and bottom landings can make a significant difference during late-night checks or early mornings.
Inspect Your Banisters and Spindles
Take a moment to check your banister. It should not wobble or feel loose. Your toddler will inevitably pull, push, and lean on it, so any instability is a major safety concern.
Next, examine the vertical posts, or spindles. The general safety rule is that the gap between them should not be wider than four inches; otherwise, a child's head or body could become trapped. You can address this by installing a banister guard—a clear plastic or mesh shield that creates a solid barrier. This is just one component of a larger safety strategy; you can find more ideas in our guide on how to childproof your home.
Common Baby Proofing Mistakes and How to Fix Them
Even the most diligent parents can make mistakes when learning how to baby proof stairs. These oversights can create a false sense of security, which is often more dangerous than having no gate at all. Knowing what to watch for helps you verify your work and feel confident in your home's safety.
One of the most frequent and dangerous errors is using the wrong type of gate at the top of the stairs. As established, a pressure-mounted gate should never be used there.
The solution is simple and non-negotiable: replace it with a hardware-mounted gate immediately. It must be screwed directly into wall studs or secured with a proper banister adapter kit.
Another common issue is improper installation. A wobbly gate, a latch that doesn't fully engage, or hardware mounted only into drywall are all destined to fail when a toddler applies their weight to it.
Fine-Tuning Your Installation for Maximum Safety
A secure fit is non-negotiable. If your gate feels loose when you shake it, it needs to be reinstalled.
- The Problem: The gate wiggles or rattles. This indicates it is not anchored securely enough to withstand a determined toddler.
- The Fix: Use a stud finder to locate solid anchor points. If no stud is available, mount a 1x4 board horizontally across the wall, screwing it into the nearest studs. This provides a solid wood surface to anchor your gate hardware.
It’s also common to underestimate a child's capabilities. Toddlers are surprisingly strong, clever, and persistent.
Many parents remove gates too soon, assuming their toddler is "old enough." The gate should remain in place until your child can consistently open it themselves or is tall enough to attempt climbing over it. At that point, the gate itself can become a climbing hazard.
Finally, a subtle but critical mistake is forgetting to check the gate regularly. Daily use can cause screws and hardware to loosen over time. Make it a habit to give the gate a firm shake and test the latch weekly. This takes less than a minute and ensures your most important safety barrier is always functioning correctly.
By auditing your setup, you can catch and correct potential weaknesses. This final check elevates your baby-proofing from "good enough" to genuinely secure, providing the real peace of mind every parent deserves.
Your Stair Safety Questions Answered
Even with a solid plan, specific questions will arise as you baby-proof your stairs. Addressing these practical details is key to building confidence in your safety measures. Here are answers to some of the most common questions from parents.
When Is the Right Time to Install Stair Gates?
The best time is before your baby is mobile. This typically occurs between six and eight months old, when they start rolling purposefully or preparing to crawl.
While it may feel early, a baby's mobility can develop very quickly. Installing gates ahead of time ensures you are prepared for their first explorations, rather than reacting to a potentially dangerous situation.
What if My Staircase Has a Banister on One Side?
This is a very common installation challenge: a solid wall on one side and a rounded or decorative banister post on the other. You need two things to solve this.
First, a hardware-mounted gate is essential. Second, you will need a banister installation kit. These adapters use straps to create a flat, secure mounting surface on your post, allowing you to install the gate hardware without damaging the woodwork.
Do not attempt to use a pressure-mounted gate in this scenario. The pressure is not distributed correctly on a rounded post, creating an unstable barrier that can be easily pushed over.
How Long Do We Need to Keep the Baby Gates Up?
Most safety experts recommend keeping gates in place until your child is at least two years old. However, the best indicator is your child's individual development, not a specific age.
It's time to remove the gate when they can consistently open it on their own or when they become tall enough to try climbing over it. At this stage, the gate itself can become a hazard. This is your cue to shift from blocking the stairs to actively teaching your child how to navigate them safely.
Can I Use a Baby Gate for My Pets Too?
Yes, many of today’s hardware-mounted gates are robust enough for both children and pets. When shopping, look for models rated for multi-use, which typically feature sturdy, all-metal construction.
Some gates include a small, built-in pet door. While convenient, consider this feature carefully. A small or determined toddler might see it as an escape route. You know your child best, so assess the risk based on their size and temperament.
For more answers to specific product questions and other parenting tips, you can always check out our detailed frequently asked questions section.
At MiniPrecious, we understand that your baby's safety is your highest priority. We offer a curated selection of high-quality, durable baby essentials designed to provide peace of mind as your little one explores their world. Discover products you can trust at https://miniprecious.com.
